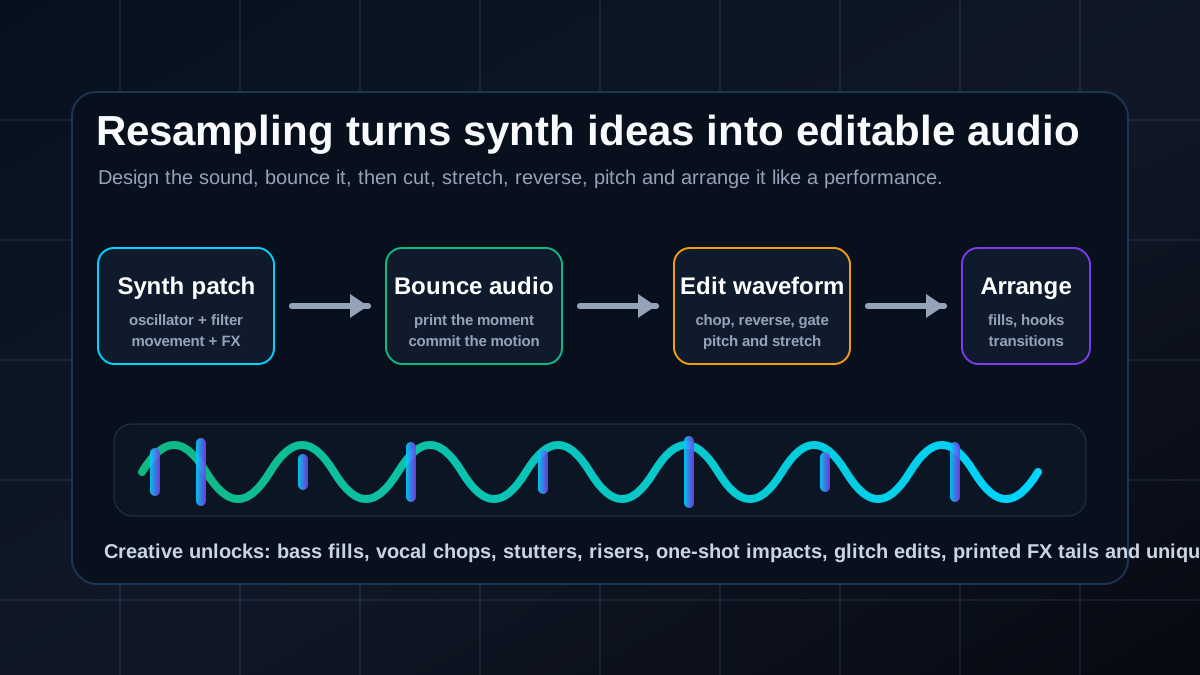
Resampling means recording or bouncing a sound back into audio so you can work with the waveform directly. Instead of keeping everything as live MIDI and endless plugin settings, you commit the sound, then use audio editing to create movement, fills, transitions and textures that are hard to make inside the synth alone.
Why resampling matters
Most beginners keep changing the synth patch forever. Advanced producers often do the opposite: they build a strong sound, bounce it, then turn that audio into several new parts. This makes production faster because the idea becomes something you can see, cut and place inside the arrangement.
Resampling also creates sounds that feel more personal. A preset stays a preset until you print it, chop it, pitch it, reverse it, stretch it, distort it or use only one tiny part of it. That is where a simple patch can become a signature bass fill, vocal throw, transition, impact or hook layer.
The basic resampling workflow
Start with a sound that already has a clear job. It might be a Reese bass, supersaw, pluck, pad, riser, vocal chop, drum loop or FX tail. Play or automate a few bars where the sound does something interesting, then bounce that region to audio.
Once it is audio, make a duplicate and experiment. Reverse one copy. Pitch another down an octave. Cut one transient into a one-shot. Stretch a small slice into a pad. Gate a rhythmic section. The original patch is only the starting point; the audio version is where the production possibilities open up.
What resampling unlocks
Resampling gives you creative moves that are awkward or impossible when everything stays live. You can reverse a bass growl into a drop, turn a delay tail into a transition, slice a synth chord into a rhythmic hook, or stretch a tiny vocal texture into an atmospheric bed.
It also helps arrangement. Instead of adding another layer, you can reuse the same sound in a new form. That keeps the track coherent because the fill, riser, stab and texture all come from the same sonic family.
- Bass fills: bounce a moving bass phrase, cut the best half-beat, reverse it or pitch it into the next section.
- Vocal chops: print a vocal phrase with effects, slice syllables and rearrange them into a hook or answer phrase.
- Risers and downlifters: reverse a reverb tail, filter it upward, then print again for a cleaner transition.
- Glitch edits: bounce a synth or drum loop, cut tiny fragments and repeat them before a drop or chorus.
- Texture beds: stretch pads, cymbals, vocals or FX tails until they become atmosphere under a breakdown.
How to resample in any DAW
The exact button changes between Ableton, FL Studio, Logic, Cubase, Bitwig, Pro Tools and Reason, but the principle is the same. Route the sound to audio, record or export it, then bring that audio back into the session on a new track.
If your DAW has a freeze, flatten, bounce in place, consolidate, render to audio, export selected region or resample input option, use that. If not, solo the part and export a short WAV, then drag it back into the project.
- Step 1: make the source sound good enough to commit. Do not wait for perfect.
- Step 2: automate one useful movement, such as filter cutoff, pitch, wavetable position, reverb send or distortion amount.
- Step 3: bounce 4, 8 or 16 bars to audio.
- Step 4: mute the original MIDI if needed, but keep it nearby as a backup.
- Step 5: edit the audio into a new musical job: fill, hook, transition, texture, impact or variation.
Resampling basses
Bass resampling is powerful because moving bass patches can get complicated quickly. Design the bass first, then print a few movement passes. Keep a clean sub separate, and resample the mid bass layer for character edits.
After bouncing, cut small parts of the mid bass into fills. Try reversing the last beat before a drop, pitching one growl down, gating a section to follow the drums, or filtering a copy for a call-and-response bass phrase. This is especially useful for drum and bass, dubstep, bass house, garage and techno.
Resampling leads, pads and vocals
Leads and pads become more interesting once you print their movement. A supersaw chord can become a short stab, a reversed swell, a filtered texture or a wide background layer. A pad can become an intro atmosphere by stretching and filtering one small moment.
Vocals are perfect for resampling. Print a delay throw or reverb tail, then reverse it into the next line. Slice a phrase into chops. Pitch a word up or down to make a transition. Use only the breath or consonant as a rhythmic layer. Small vocal resamples often make a track feel finished without adding a full new part.
Resampling drums and FX
Drum resampling lets you create fills from your own groove. Bounce one bar of drums, then cut, repeat, reverse or filter the final beat before a section change. Because it comes from the existing kit, it usually fits better than a random fill sample.
For FX, print reverb throws, delay feedback, phaser sweeps, distortion builds and filter automation. Once the effect is audio, you can cut the tail exactly where the vocal or snare needs space. This gives you more control than leaving a long live effect ringing across the mix.
Common resampling mistakes
The first mistake is resampling too early, before the sound has a clear role. The second is resampling too late, after you have wasted an hour tweaking a patch that was already good enough. Commit when the sound has the right energy, not when every knob is perfect.
Also watch gain and timing. Printed audio can get louder after processing, and reversed or stretched sounds may drift away from the groove. After every resample edit, check the level, fade clicks, confirm the timing and make sure the part still supports the song.
Do this 30-minute resampling drill
Open an existing synth patch or build a simple one from scratch. The goal is to create useful audio, not to design the perfect preset.
- Bounce 8 bars of a moving synth, bass or vocal effect.
- Create one reverse transition from the bounce.
- Create one short fill by chopping the waveform.
- Create one stretched texture for an intro or breakdown.
- Save all three audio edits with clear names.
The big takeaway
Resampling turns sound design into arrangement. It helps you stop treating synth patches as static presets and start treating them as raw material. Once you bounce audio, every tiny moment can become a hook, fill, transition, atmosphere or signature sound.
Use it when the track needs movement, identity or momentum. Build the sound, print the sound, then make it do something the live synth would not naturally do.